
 Originating in the 16th century and gaining great popularity throughout the Industrial Revolution, handcrafted wallpaper reached a peak in elegance in the late nineteenth century. Spearheading the Arts and Crafts Movement, William Morris and Andrew Webb conceived a marriage of functionality and beauty in design that casts a sense of shame over anyone typing in a room lazily thrown together around a faded “Billy” by Ikea. Some of their wallpaper designs such as “Trellis” (Morris and Webb), “Strawberry Thief” or “Acanthus” (both by Morris and Co.) exude a timeless finesse that remains breathtaking, even by contemporary standards.
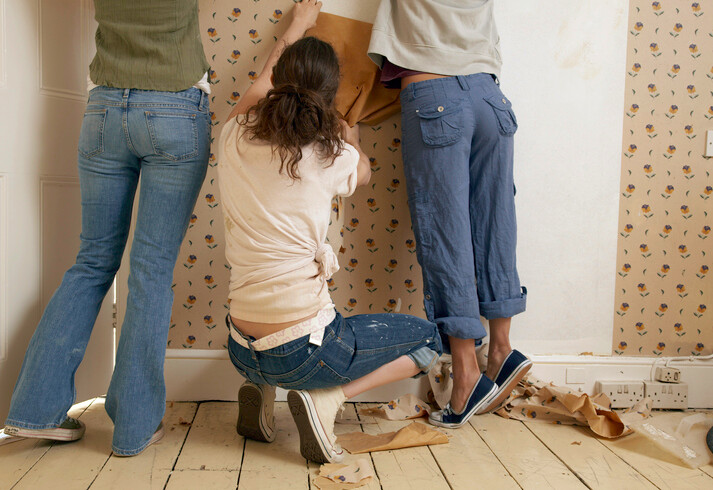
Fortunately a lot of that ornate, handcrafted wallpaper has been preserved to this day. For, although designs have changed over the decades, the one timeless and enduring truth about wallpaper has remained constant: it’s a real pain to get off. That said, with some careful planning, the right tools and a bit of patience, your wallpapered room can be transformed into a space that comes closer to appeasing your own dubious taste.
If you’ve been bitten by the decorating bug and you’re feeling prepared to face whatever structural damage that hideous, niggling wallpaper has likely been hiding, read on. In this blog we’ll take you through the steps to a relatively painless redecorating process, commencing with stripping wallpaper.
Remember that Tool Chest Hire is located in Hammersmith and stock all the decorating equipment you need to tackle your projects.They can also offer helpful advice, so you’re not in this alone. Let’s break it down:
Step 1: Stripping Wallpaper
The first and often most challenging step in redecorating a wallpapered room is removing the existing wallpaper. Depending on the type of wallpaper, the adhesive used and the level of inebriation of the last decorator, this task can range from relatively easy to quite tricky. Here are a few tips to help you get started:
Tools you'll need:
- Wallpaper steamer (or wallpaper stripping machine).
- Extension cord (if necessary).
- Utility knife or wallpaper scraper.
- Wallpaper perforator.
- Drop cloths or plastic sheeting.
- Gloves and safety goggles (recommended).
- Wine, chocolate, coffee or anything else you are likely to need in order to stay motivated.
Preparation:
- Clear the room and cover the floor and any remaining furniture with drop cloths or plastic sheeting.
- Use the wallpaper perforator to make holes in the wallpaper, this will allow steam to penetrate more easily, helping soften the dried adhesive.
- Fill the steamer with water.
- Plug in the steamer and wait for it to heat up.
How to use a wallpaper steamer:
- Hold the steamer's nozzle against the wallpaper you want to remove. Start from the top of the wall and work your way down.
- Keep the nozzle in contact with the wallpaper for about 20-30 seconds, allowing the steam to penetrate and loosen the adhesive.
- After steaming a section, use a utility knife or wallpaper scraper to gently lift the softened wallpaper. Try to aim away from your own soft tissue. Start from the top and peel it away carefully. If it doesn't come off easily, steam the area for a bit longer.
- Move the steamer along the wall in manageable sections, steaming and then scraping as you go.
- Be cautious when using the utility knife or scraper to avoid damaging the underlying wall surface. Hold it at a low angle and use gentle pressure. If you encounter stubborn areas or multiple layers of wallpaper, you may need to go over them several times with the steamer to fully loosen the adhesive. This is where your wine, chocolates or coffee come in handy.
Clean Up:
- Turn off the wallpaper stripping machine and unplug it from the power source.
- Allow it to cool down before emptying any remaining water from the tank.
- Dispose of the removed wallpaper and any adhesive residue properly.
- Remove the drop cloths or plastic sheeting, and clean up any water or adhesive drips on the floor or furniture.
- Celebrate by finishing your wine, chocolate or coffee.
Safety Tips for Using a Wallpaper Steamer:
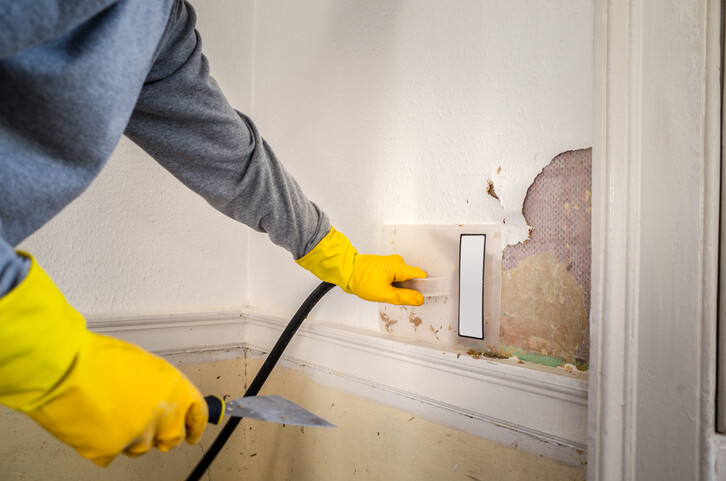
- Always wear gloves and safety goggles when using a wallpaper steamer, as hot steam and adhesive residue can cause burns and eye irritation.
- Be cautious not to over-soak the wallpaper, as excessive moisture can damage the underlying wall surface.
- Keep the steamer away from electrical outlets and switches to avoid the risk of electric shock.
- If you're stripping wallpaper in a room that may contain asbestos, take proper precautions and consult a professional for safe removal.
Step 2: Repair and Prep the Walls
After successfully striping the wallpaper, it's essential to prepare the walls for redecoration. This step includes patching any holes, cracks or imperfections, as well as ensuring the walls are smooth and ready for painting or for new wallpaper.
Tools you'll need:
- Spackling compound or drywall filler.
- Sandpaper or a drywall sander.
- Primer.
- Paint or new wallpaper.
Procedure:
- Fill any holes or cracks with a spackling compound, smoothing it out with a putty knife.
- Once the compound is dry, sand the walls to create a smooth surface.
- Apply a coat of primer to the walls to ensure proper paint or wallpaper adhesion.
- Allow the primer to dry completely before proceeding with your chosen redecoration method.
At Tool Chest Hire, we offer a wide range of painting tools and equipment, including paint sprayers and sanders, to help you achieve a professional finish during this step.
Step 3: Choose Your New Look
Now comes the fun part – selecting the new look for your room! Whether you opt for fresh paint, new wallpaper or a combination of both, it is worth taking a moment to reflect on all the pain you just endured stripping that last lot of wallpaper. Once you have come to your questionable decorating decision, remember that Tool Chest Hire offers an array of tools and equipment to make the process smooth and efficient.
Options to consider:
- Painting: If you choose to paint your room, consider the colour scheme that best suits your style and the room's purpose.
- Wallpapering: Wallpaper comes in an endless array of patterns and designs. Choose one that complements your decor and personality, and let the hideous cycle begin afresh!
- Combination: Mix and match by using paint on some walls and wallpaper on others. This can create a visually appealing contrast and help reduce the wallpaper stripping work next time around.
Choose Tool Chest Hire for all of your decorating equipment needs
Redecorating a room that has been wallpapered may seem like a daunting task, some say it’s about as much fun as watching paint dry. Nonetheless, with the right tools, careful planning and a bit of creativity, you can transform your dated space into something truly spectacular. At Tool Chest Hire in Hammersmith, we're here to support your redecoration journey every step of the way. Get in touch on 020 8748 7912 and let's get started!